> ## Documentation Index
> Fetch the complete documentation index at: https://protegee.ai/docs/llms.txt
> Use this file to discover all available pages before exploring further.
# Vapi
> Integration steps for Vapi
## Integration
### Collecting Payment
In VAPI, you'll need to create the `SendContextToProtegee` and `GetContextFromProtegee` tools in order to let your agent interact with Protegee. Don't worry, all this requires from you is to press a button.
You'll want to grab your VAPI private api key. It will look like:
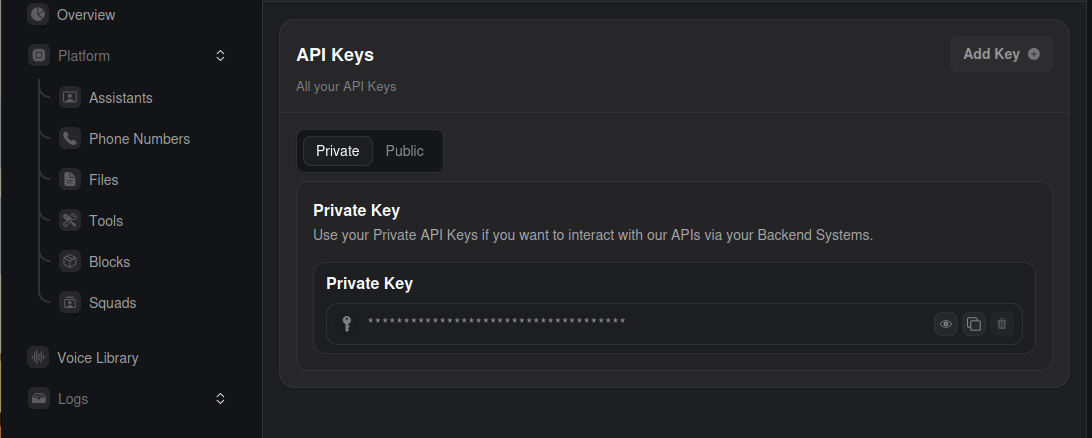 Once you have that, you can run the following curl command (but replace `my_protegee_api_token` and `my_vapi_private_key` with the correct keys)
```bash cURL theme={null}
curl --request POST \
--url 'https://protegee.ai/voice/api/v1/vapi/create_tools?api_token=my_protegee_api_token' \
--header 'Content-Type: application/json' \
--data '{
"vapi_key": "my_vapi_private_key"
}'
```
```python Python theme={null}
import requests
url = "https://protegee.ai/voice/api/v1/vapi/create_tools"
querystring = {"api_token":"my_protegee_api_token"}
payload = {"vapi_key": "my_vapi_private_key"}
headers = {"Content-Type": "application/json"}
response = requests.request("POST", url, json=payload, headers=headers, params=querystring)
print(response.text)
```
```java Java theme={null}
const options = {
method: 'POST',
headers: {'Content-Type': 'application/json'},
body: '{"vapi_key":"my_vapi_private_key"}'
};
fetch('https://protegee.ai/voice/api/v1/vapi/create_tools?api_token=my_protegee_api_token', options)
.then(response => response.json())
.then(response => console.log(response))
.catch(err => console.error(err));
```
You can also manually try out the endpoint by checking out: [VAPI Create Tools](http://localhost:3000/api-reference/endpoint/create-tools_vapi)
On Assistant 1's function page, make sure `SendContextFromProtegee` is selected from the dropdown and the forwarding phone number is set to Protegee's number (you can this at [settings](https://protegee.ai/settings)).
Once you have that, you can run the following curl command (but replace `my_protegee_api_token` and `my_vapi_private_key` with the correct keys)
```bash cURL theme={null}
curl --request POST \
--url 'https://protegee.ai/voice/api/v1/vapi/create_tools?api_token=my_protegee_api_token' \
--header 'Content-Type: application/json' \
--data '{
"vapi_key": "my_vapi_private_key"
}'
```
```python Python theme={null}
import requests
url = "https://protegee.ai/voice/api/v1/vapi/create_tools"
querystring = {"api_token":"my_protegee_api_token"}
payload = {"vapi_key": "my_vapi_private_key"}
headers = {"Content-Type": "application/json"}
response = requests.request("POST", url, json=payload, headers=headers, params=querystring)
print(response.text)
```
```java Java theme={null}
const options = {
method: 'POST',
headers: {'Content-Type': 'application/json'},
body: '{"vapi_key":"my_vapi_private_key"}'
};
fetch('https://protegee.ai/voice/api/v1/vapi/create_tools?api_token=my_protegee_api_token', options)
.then(response => response.json())
.then(response => console.log(response))
.catch(err => console.error(err));
```
You can also manually try out the endpoint by checking out: [VAPI Create Tools](http://localhost:3000/api-reference/endpoint/create-tools_vapi)
On Assistant 1's function page, make sure `SendContextFromProtegee` is selected from the dropdown and the forwarding phone number is set to Protegee's number (you can this at [settings](https://protegee.ai/settings)).
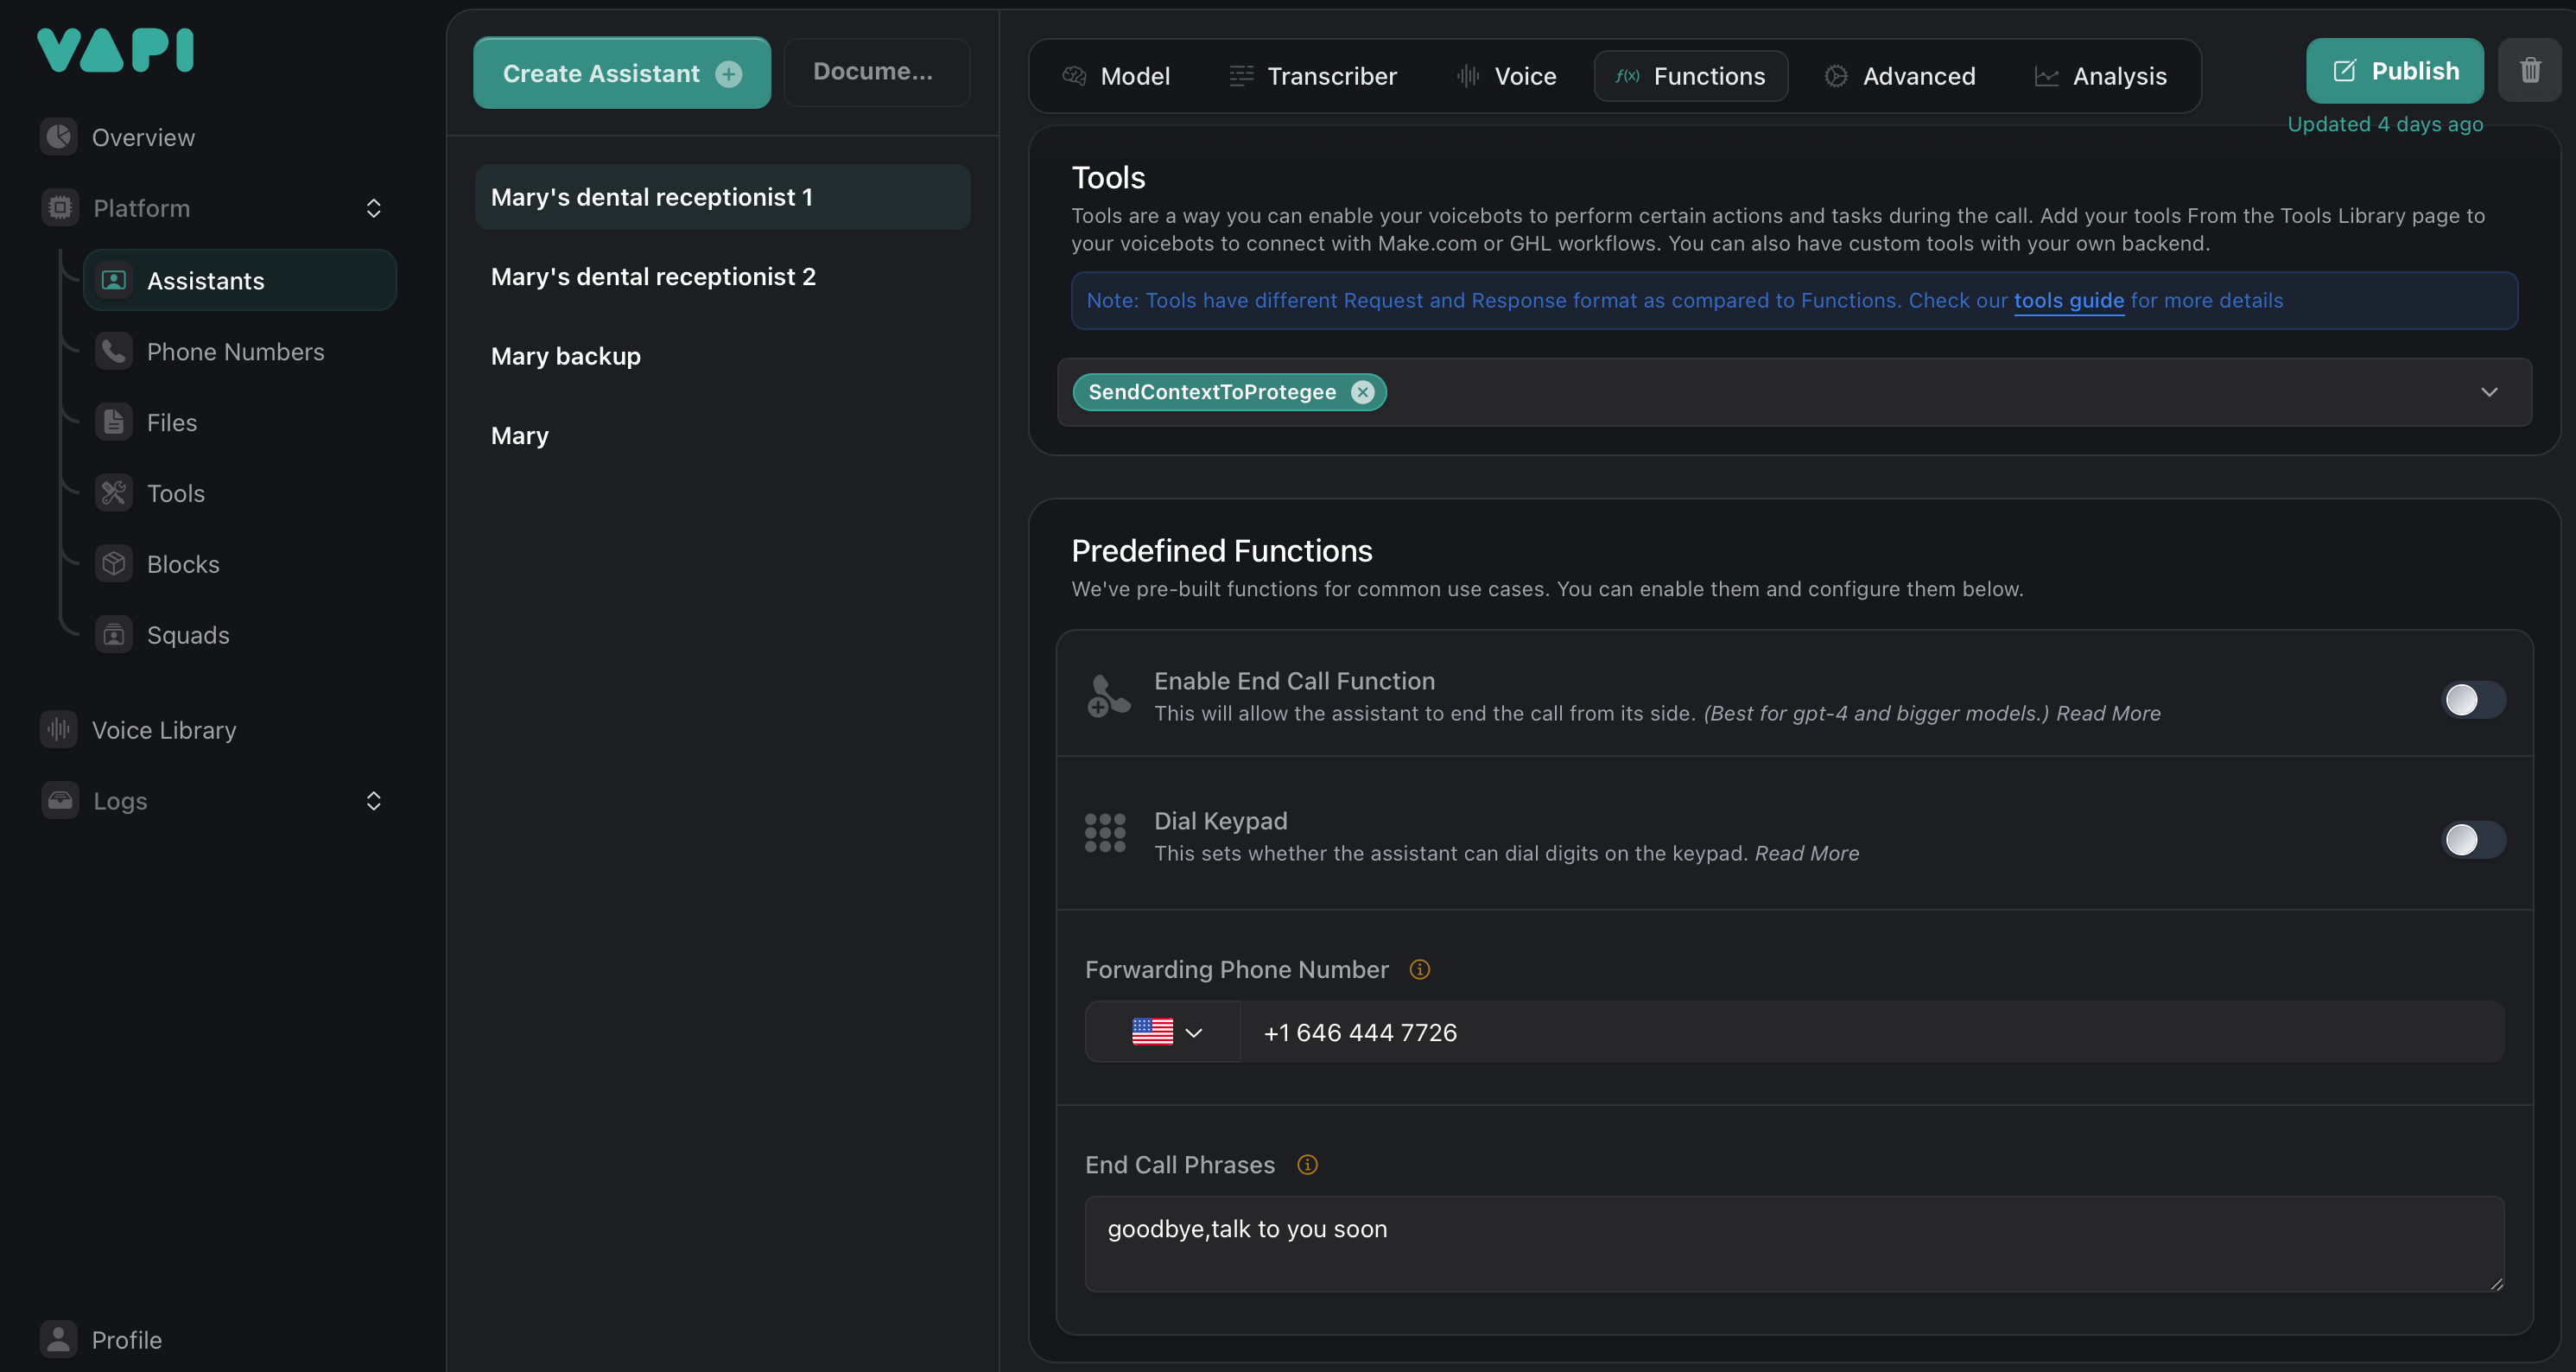 This lets Protegee know who to handle the payment for and how much. Something similar to:
Send the details to Protegee with the tool SendContextToProtegee, including all fields
requested by SendContextToProtegee
Let the caller know you need to take a \$25 deposit to confirm the appointment, and ask
them to let you know when they're ready with their credit card
Transfer the caller to Protegee at the saved transfer phone number. Just tell the caller
to hang on one sec while you get the secure payment process ready.
If you have any issues, check out the [debug](https://protegee.ai/debug) page for more information.
### Checking on the status of the payment
The following instructions are OPTIONAL. If you specified a number in the `callback` field, [Protegee](https://protegee.ai) will transfer the caller back to this number once the payment process is complete. In order to continue the call, you'll want to make a webhook to get details on how the call went. The following are instructions on how to do that.
If you'd like the caller to be transferred back from Protegee, make a second agent and enable `GetContextFromProtegee` on the agent's Functions page.
On Assistant 1's function page, make sure `SendContextFromProtegee` is selected from the dropdown and the forwarding phone number is set to Protegee's number (you can this at [settings](https://protegee.ai/settings)).
This lets Protegee know who to handle the payment for and how much. Something similar to:
Send the details to Protegee with the tool SendContextToProtegee, including all fields
requested by SendContextToProtegee
Let the caller know you need to take a \$25 deposit to confirm the appointment, and ask
them to let you know when they're ready with their credit card
Transfer the caller to Protegee at the saved transfer phone number. Just tell the caller
to hang on one sec while you get the secure payment process ready.
If you have any issues, check out the [debug](https://protegee.ai/debug) page for more information.
### Checking on the status of the payment
The following instructions are OPTIONAL. If you specified a number in the `callback` field, [Protegee](https://protegee.ai) will transfer the caller back to this number once the payment process is complete. In order to continue the call, you'll want to make a webhook to get details on how the call went. The following are instructions on how to do that.
If you'd like the caller to be transferred back from Protegee, make a second agent and enable `GetContextFromProtegee` on the agent's Functions page.
On Assistant 1's function page, make sure `SendContextFromProtegee` is selected from the dropdown and the forwarding phone number is set to Protegee's number (you can this at [settings](https://protegee.ai/settings)).
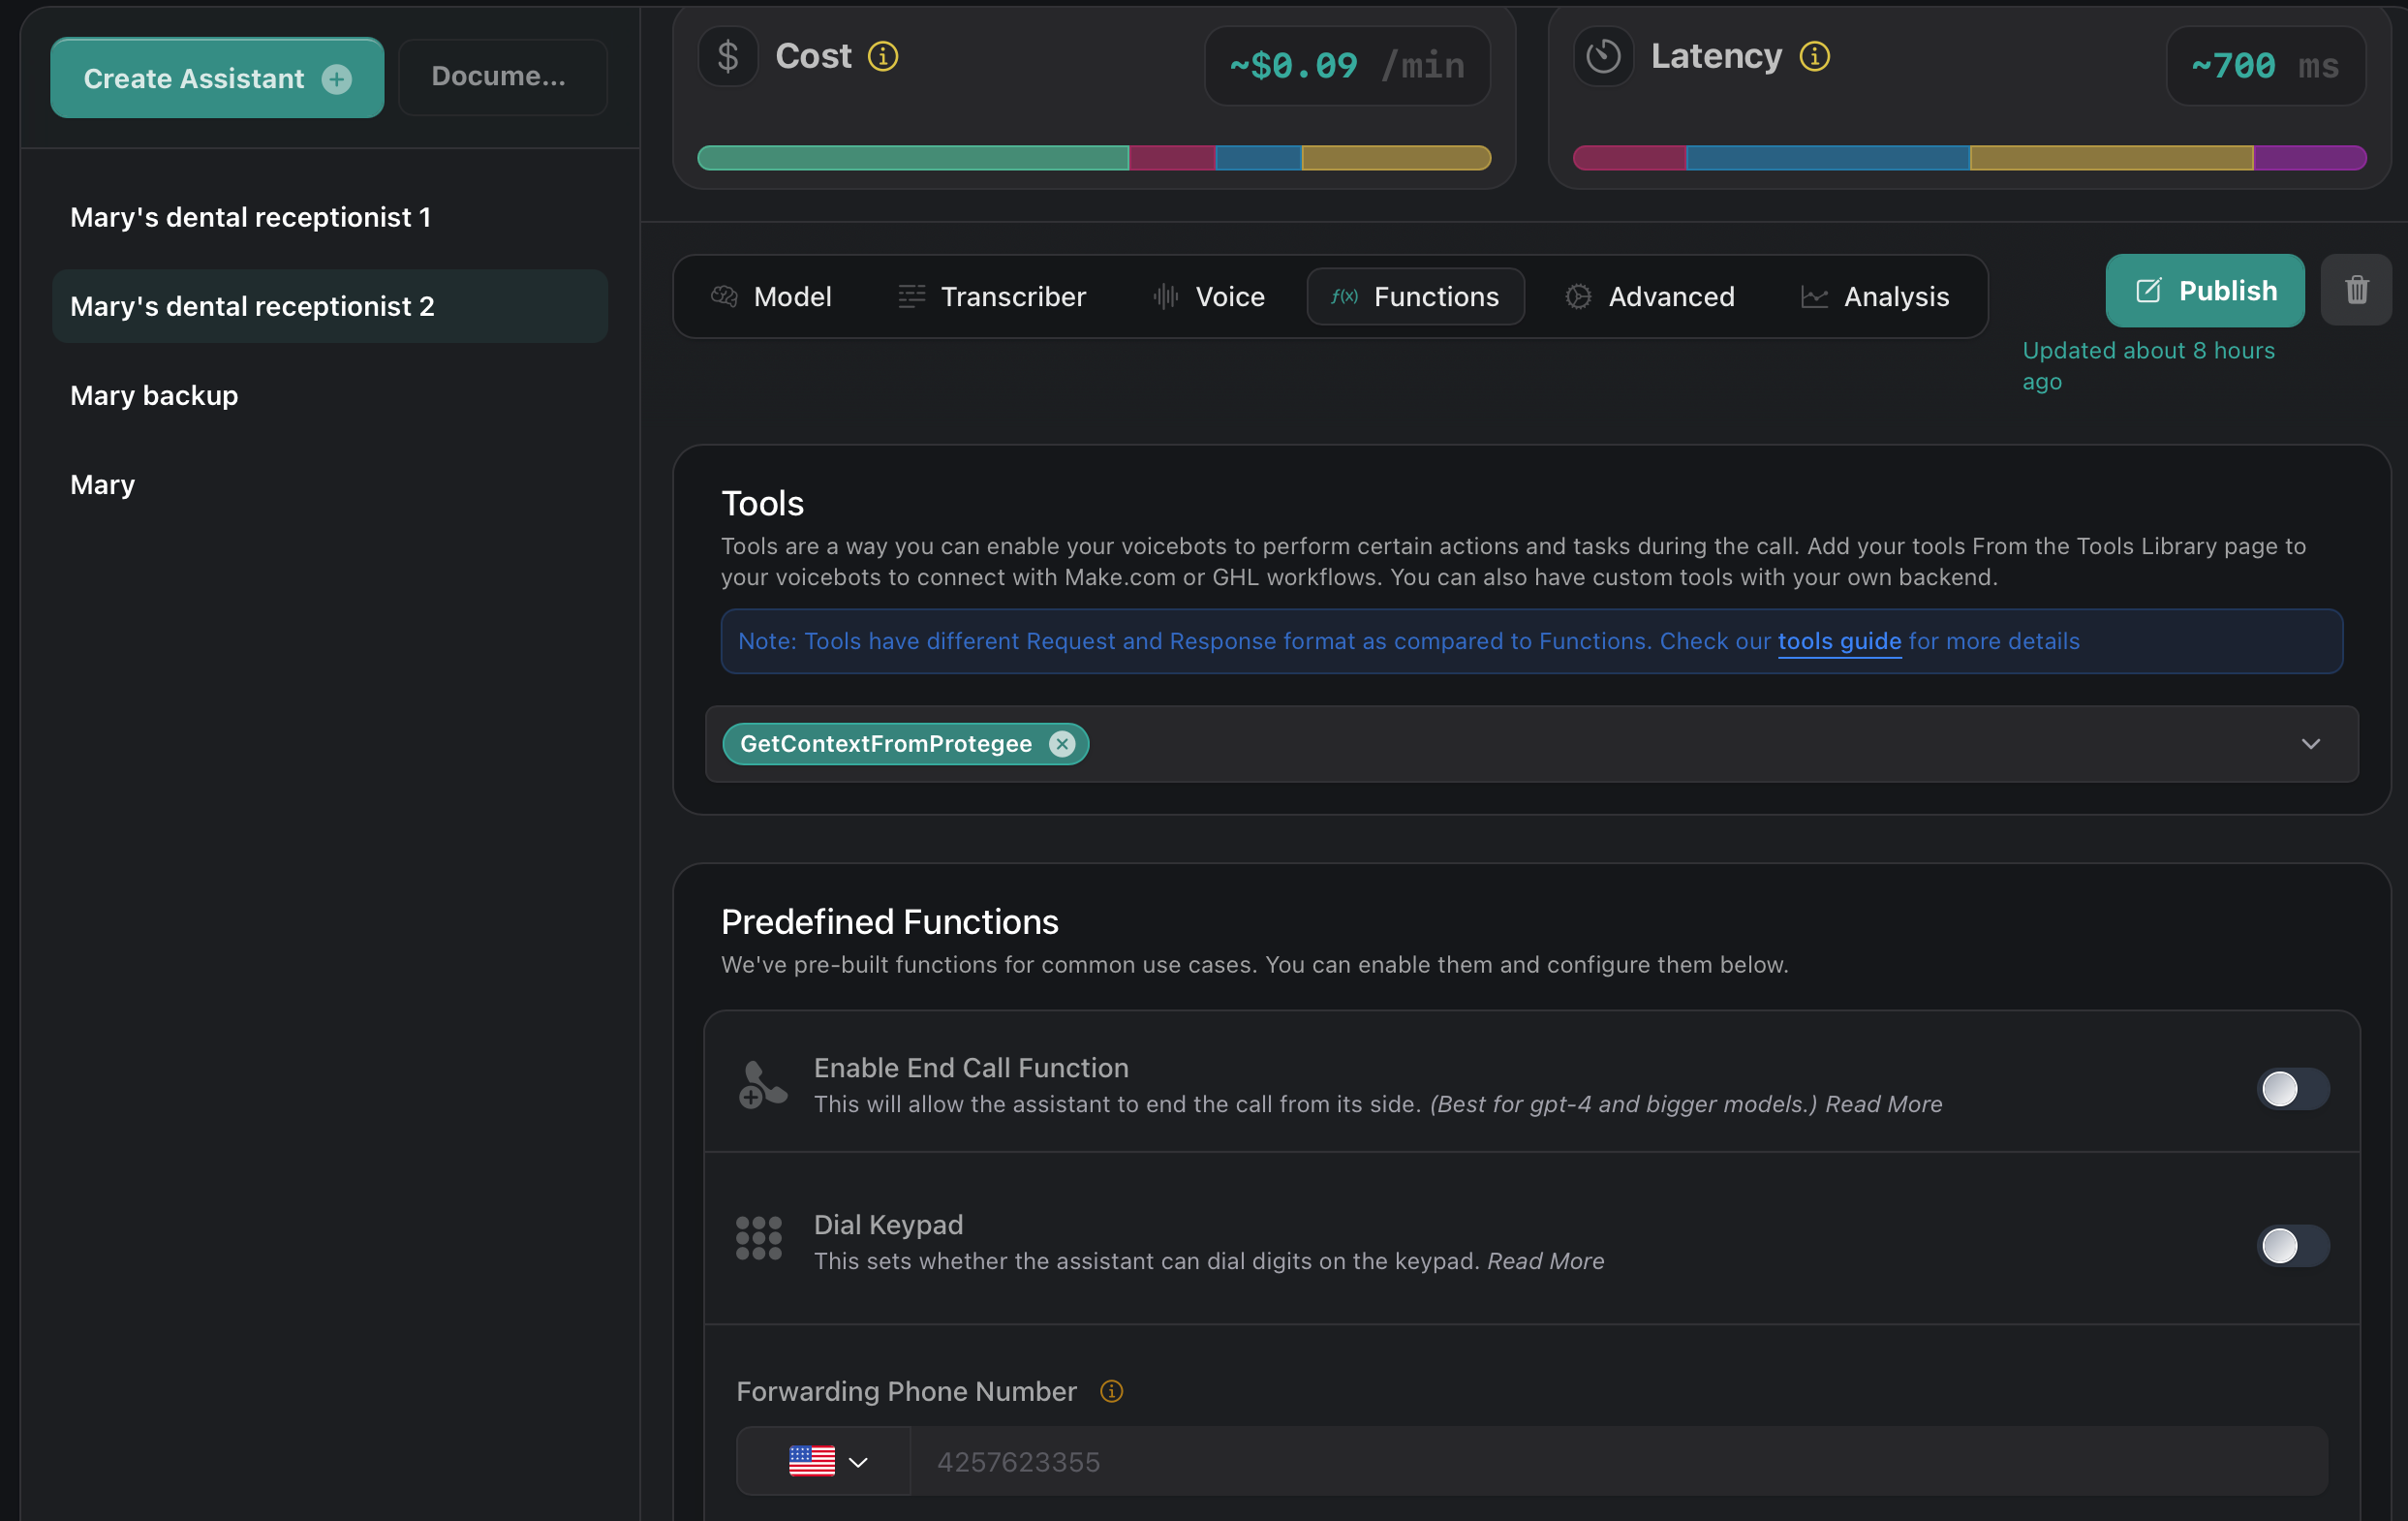 You can add something like this to Agent 2's prompt.
After you greet the caller with the first message, immediately call the
GetContextFromProtegee function and read back the response to the caller.
Then ask if there's anything else you can help with.
If they wish to book an appointment, your goal is to gather necessary information from
callers in a friendly and efficient manner like follows…
If you have any issues, check out the [debug](https://protegee.ai/debug) page for more information.
You can add something like this to Agent 2's prompt.
After you greet the caller with the first message, immediately call the
GetContextFromProtegee function and read back the response to the caller.
Then ask if there's anything else you can help with.
If they wish to book an appointment, your goal is to gather necessary information from
callers in a friendly and efficient manner like follows…
If you have any issues, check out the [debug](https://protegee.ai/debug) page for more information.